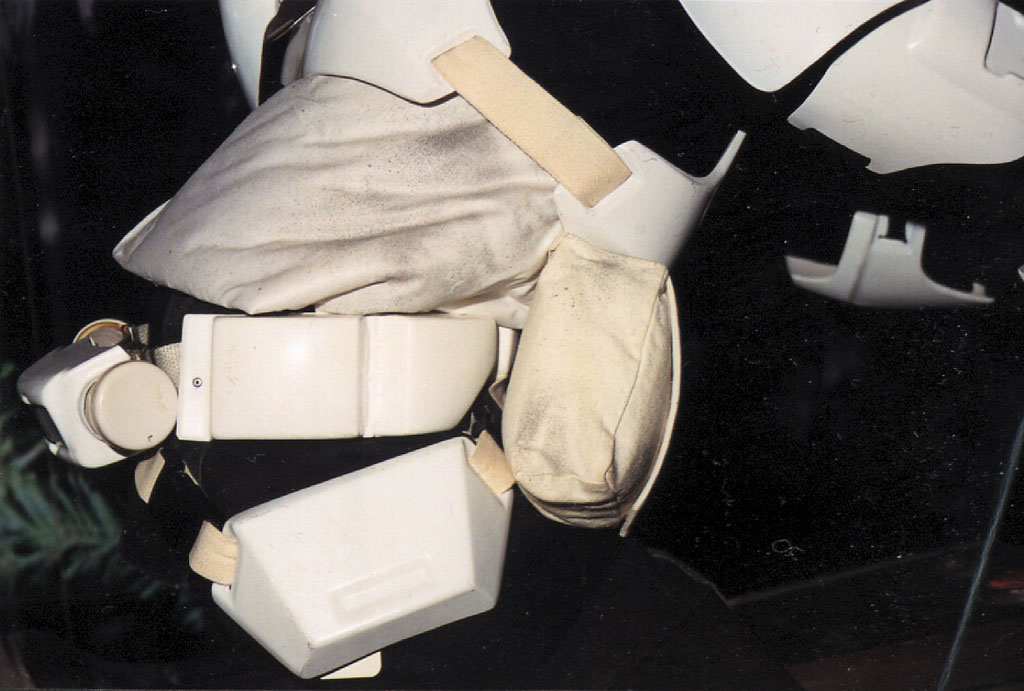
The Utility Belt
The belt is probably the most complicated part of the costume.
The belt consists of:
- 5 belt boxes that attach directly to the belt,
- 2 thigh boxes that hang off the belt on the sides,
- 1 thermal detonator that clips to the back of the belt.
Belt Boxes
The 5 smaller utility boxes are molded directly into one continuous belt strip. The boxes are generally 9 cm wide, 6.5 cm tall and 2.5 cm deep.
There is a diamond-esque shaped belt buckle box in the center, 2 beveled boxes on each side of that, and then 2 rectangular boxes that are on the outer ends of the utility belt.
You will probably want to refer to our plaster casting , vacuumforming sections, and fiber-glassing to make your final parts.
The Thigh Boxes
The thigh boxes are approximately 11.5 cm deep, 17.8 cm wide in the front and 19 cm wide in the back along it's base. The front wall is 5 cm tall and the back wall is 9 cm tall. The top surface is 14.5 cm wide in the front, 16.5 cm wide in the back and 7.6 cm deep.
You will probably want to refer to our plaster casting , vacuumforming sections, and fiber-glassing to make your final parts.
Thermal Detonator
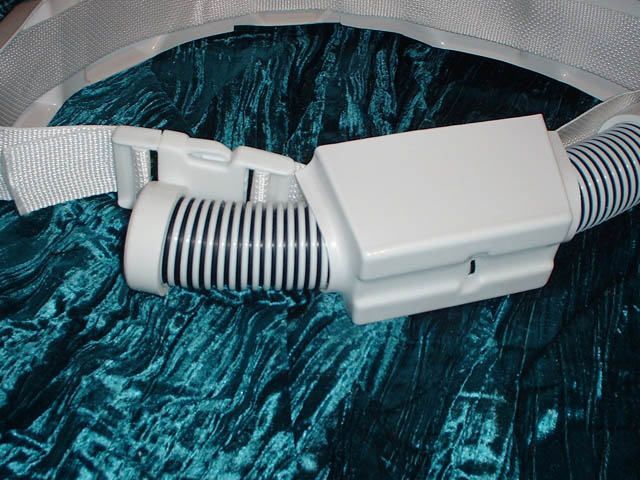
The Thermal Detonator consists of:
- • one ribbed hose, (30.5 cm long, grey ribbing, black valleys)
- • two cylindrical endcaps (5 cm diameter, white)
- • one box (white, covers the middle part of the hose)
- • two Belt Clips (metal, for durability)
- • one Zip-Tie (black)
- • one Circle Greeblie (black)
- • two Square Greeblies (black)
The white box is 12 cm wide, 6 cm tall, and 6 cm deep. The endcaps sticking out of the sides of the hose are 5 cm wide in diameter. The top recessed area that runs the width of the thermal detonator is about 6 mm deep.
A particularly noticeable part of the Thermal Det box is the recessed area on the top of the box. A lot of prop makers miss this area in their haste. This area is .6 cm deep on our molds.
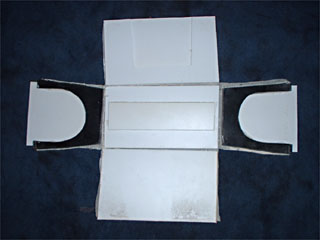 Since the Thermal Det box is essentially a square, we decided NOT to sculpt the object in clay, but to make a rigid pattern out of sheet plastic. We would then tape up the seams, pour in plaster, and giving us a final mold much quicker than sculpting.
 Here is the pattern taped up. We needed to make sure all the seams were sealed, or the liquid plaster would seep out before it got hard (then all this work would have been for nothing.)

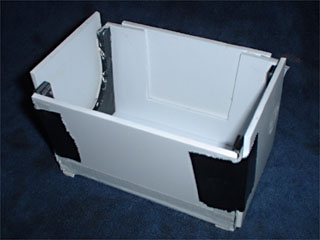
The final product. This image is actually of our old plaster mold, which had been through a lot of abuse over the years. Your thermal det mold would look might prettier.
You will probably want to refer to our plaster casting , vacuumforming sections, and fiber-glassing to help make your own box.
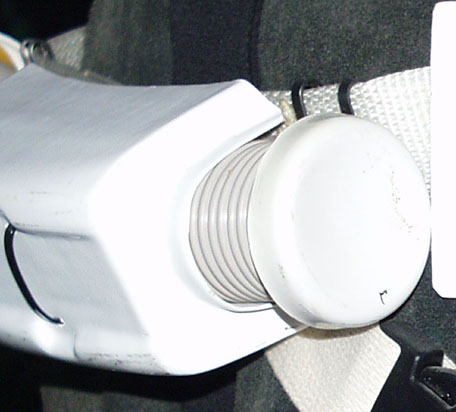
ILM attached the housing box to the ribbed tube via a BLACK ZIP-TIE. The pipe was fastened to the cloth belt with a couple of METAL CLIPS that slid over the top of the cloth web belt. No one has identified what these clips are yet, but "money clips" are the accepted replacement item used today by costumers.
The image below, taken at the 2002 Magic of Myth Touring Exhibit, shows the zip-tie and the metal clips...
Thermal Det Greeblies
On the Screen-used Biker Scout costumes, there are three black greeblie bits attached to the thermal det box in the recessed area on the top. ONE Rectangular shape , ONE Circle shape, and an exposed Zip-Tie. The circle shape is placed to the right of the zip-tie, and the rectangle shape on the left of the zip-tie.
Below we have adjusted the color spectrum of the screen-captured image to accentuate the circle and rectangle shapes.
1 circle
1 zip tie
1 rectangle (identified as "Square Square" in the image)
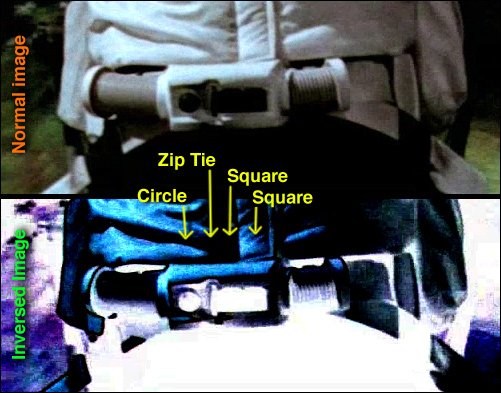
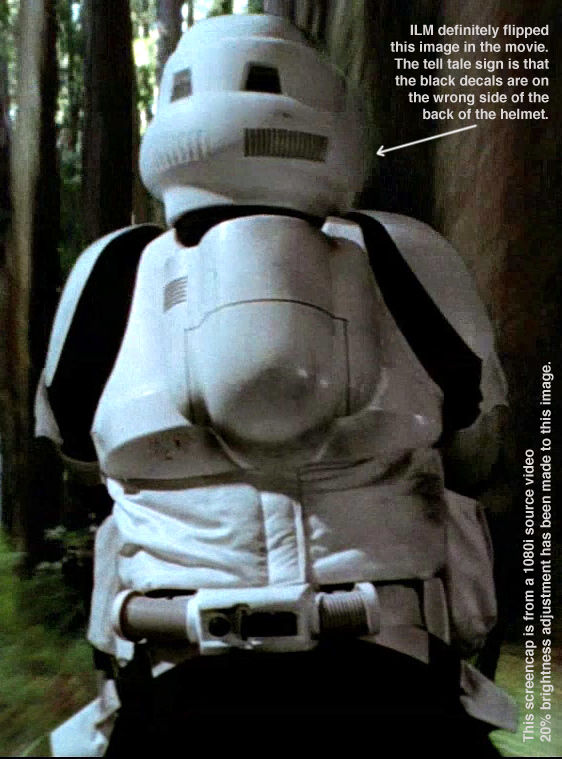
The image above is one of the best images from the movie, but, the image is misleading. Lucasfilms 'horizontally flipped' the image in post-production of the movie, so the biker scout looked over his right shoulder instead of his left shoulder. This flipped image has confused costumers for many years.
In 2011 some more information on the greeblies were revealed when Lucasfilms released the blu-ray version of Return Of the Jedi. In the 'behind the scenes' Extras Disc, close up shots were taken of the Biker Scout costume. Fans finally saw, in good detail, what the Thermal Det greeblies looked like (image below).
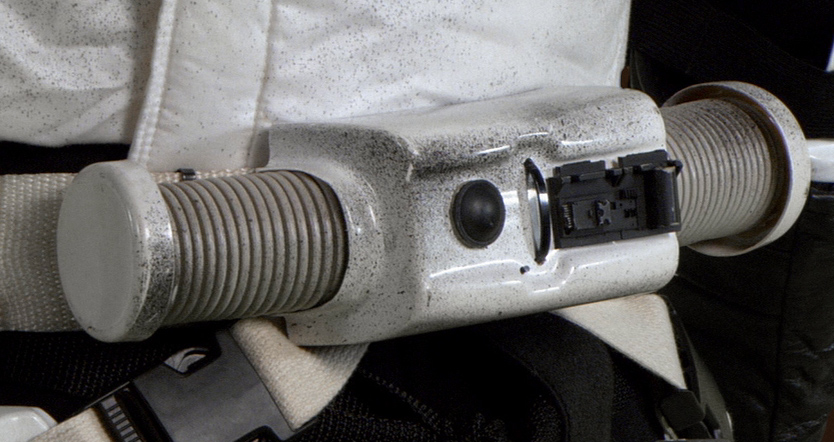
NOTE: The ILM costumers used a "reversed costume" and they have the rectangle on the right, when it should be on the left. The reversed costume is also identified by having a boot holster on the left boot, not the right boot.
NOTE: In 2014, some hardcore researchers (MonsieurTox) on TheRFP.com identified a small part of the rectangular greeblie to be a part of an engine for a 1/12th scale model kit of a Formula 1 Ferarri 312 T4. The make of model has not been identified (at least 3 companies have made a 1/12 model of that car over the years).
Most costumers make their Thermal Det Greeblies out of resin or plastic strips. A few have carved/sanded these bits out of wood. Make yours out of whatever material you feel comfortable with. Attach the greeblies with glue, two-part epoxy resin, or screw them to the white box from the inside of the box (because there are no visible screw heads)
-end section
©2010 Studio Creations - All Rights Reserved