The HOLDING FRAME
Remember that you will want to measure and build the frames to fit the oven that you will be using.

NOW you're ready to Vacuum-Form!!!!!
NEXT: The VACUUM TABLE
The HOLDING FRAME |
||
|
|
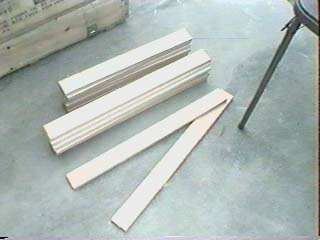
Construct two frames out of 1X3 boards. Try to stay away from soft woods like pine when making your holding frames. I recommend using birch or walnut. The more dense the wood, the longer the wood will hold up agaist the heat of the oven. I have been using the same walnut frames for over 8 years now (Jan. 2007), where my earlier pine frames only lasted 2 years before they were charred black.
Remember that you will want to measure and build the frames to fit the oven that you will be using. |
|
| |
||
|
|
We will connect the wood frame together with metal brackets. | |
| |
||
|
|
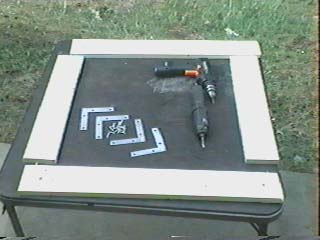
Lay down two short pieces of wood and two long pieces in the fashion shown. | |
| |
||
|
|
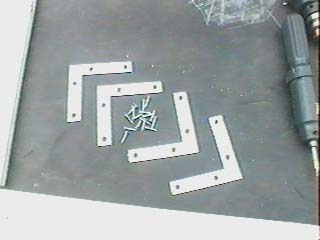
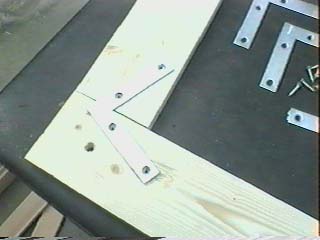
Position the metal joints at the seam areas of the wood. | |
| |
||
|
|
Mark the holes that will need to be drilled to accomodate the screws. Drilling the holes is imperative for a proper placement of the brackets. Also, forcing the screws into the wood without drilling holes may "Split" the wood. We DO NOT want to split the wood. | |
| |
||
|
|
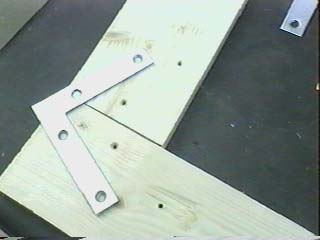
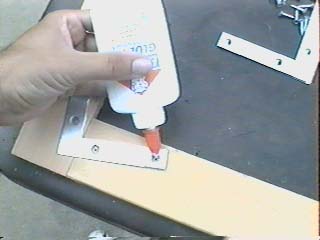
Once the holes are drilled, pour a little glue into the holes, then screw in the screws while the glue is still wet. The glue will secure the screws into the wood extremley well. You do not want the screws falling out due to the extreme temperatures we will be forcing on these frames. | |
| |
||
|
|
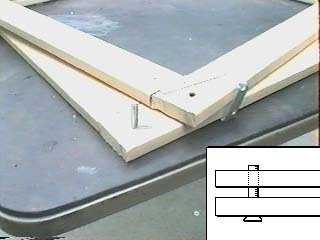
Once the brackets are inplace you will want to be able to secure the frames on to each other so that you can Squeeze the plastic in between them. In the past I used "Lock-down Clamps" and found they worked 'okay'. Another way to connect the frames together is to drill a hole through the Two frames while they are ontop of each other and attaching a long screw to the bottom frame. Do this for each corner of the frames. Once the Bottom frame has 4 screws in it, you will be able to pull the top frame off. These 4 screws work well in keeping the plastic secure inbetween the frames. | |
| |
||
|
|
A good piece of advice is to mark the frames so you know which way you connected them. I found it troublesome to laydown my plastic only to find out I placed the plastic on the wrong side of the frame in my hastey preparation. The markings help you remmember which way the frames line up together.
NOW you're ready to Vacuum-Form!!!!! |
|
|
NEXT: The VACUUM TABLE |
||