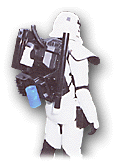
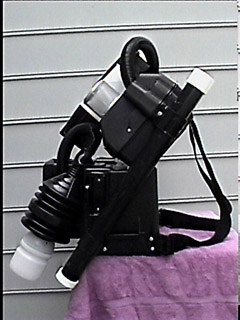
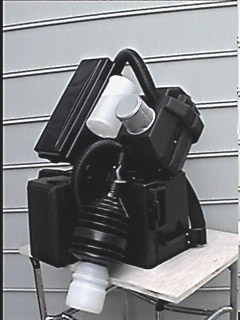
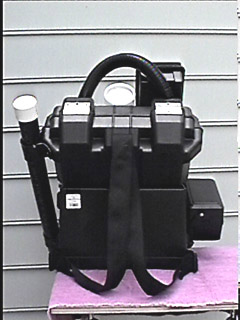
Here we will show you how we made our "compartment" Sandtrooper Backpack. All the parts were bought from a local department store. Most things came from the sporting goods or office supply sections. We chose to buy only "black" plastic boxes, so we would not have to paint anything, and therefore risk chipping the paint while wearing the backpack in public. This backpack is only about 60% accurate looking to the ILM movie backpack, and I think the bottom box is a little too short, but for $30.00 we are not complaining.
MATERIALS USED |
||||
|---|---|---|---|---|
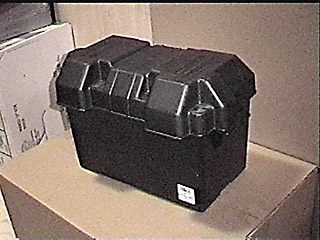
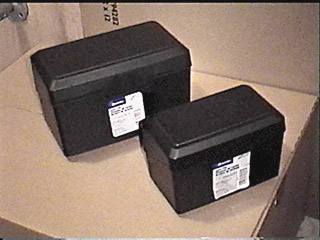
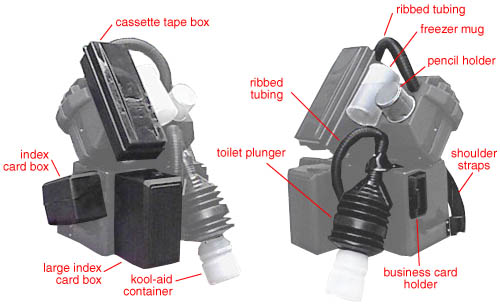
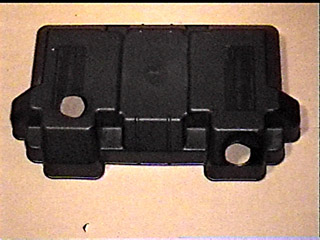
(2) Boat Battery Boxes |
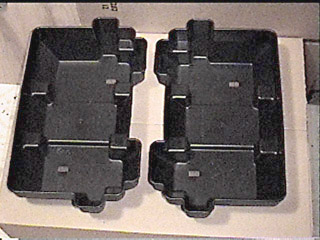
The Battery Box Covers |
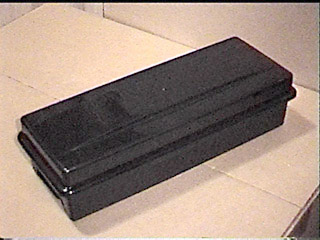
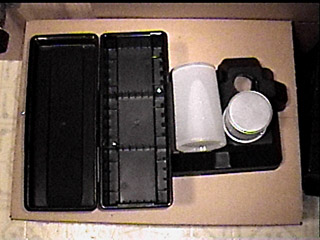
(1) Large and (1) Small Index Card Boxes |
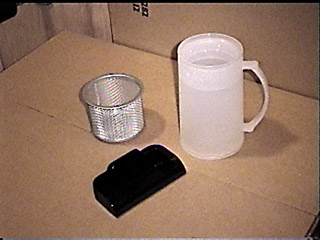
(1) Metal Mesh Pen Cup, (1) Freezer Mug and (1) Business Card Holder |
|
Cassette Tape Holder |
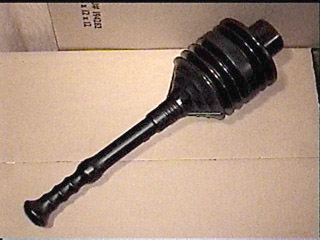
Black Toilet Plunger
|
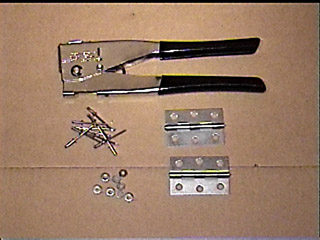
(2) Hinges, various Rivets and (1) Rivet Gun |
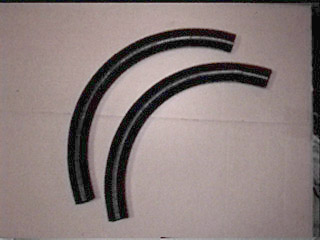
(2) Flexible Ribbed Tubing (1 inch diameter)
|
|
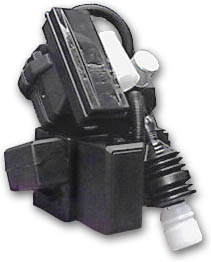
First lets prepare the battery covers by cutting two holes in the top of them. These holes will hold one of the Ribbed Flex-Tubing that detail the backpack.
I cut the holes for the tubing with a blade/knife. I just drew the circle needed and scored the plastic multiple times, untill I finally cut through the plastic fully. I tend to score by applying a medium pressure on the blade. This way, if I slip, I do not cut myself because I was putting too much pressure behind the sharp knife.
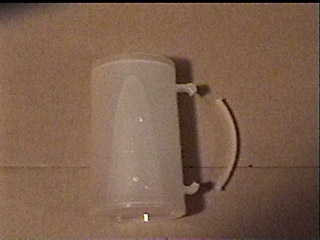
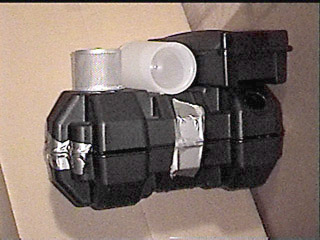
We need to attach the Freezer Mug to the Battery cover we just cut holes into. Cut the handle off the mug, but keep about 1/2 inch of handle available. This area left will be our connecting point to the battery cover
Size up the mug and cut two square holes where the remaining handle tabs of the Freezer Mug will slide through the Battery Cover surface.
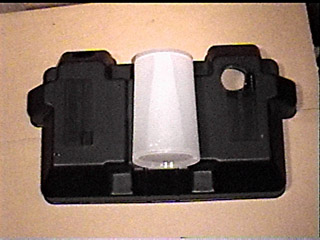
Here we show the position of the Freezer mug on the Battery Cover. Notice that we left room to the left of the Mug for the Cassette Tape Holder.
We painstakingly set two screws into the Freezer Mug Handle tabs. We predrilled holes into the handle to ensure the plastic would not crack during the screw placement.
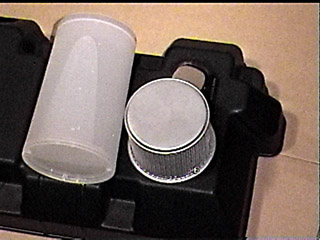
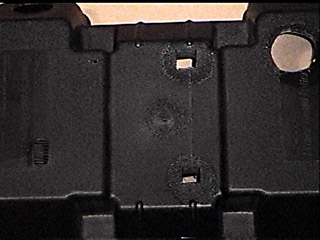
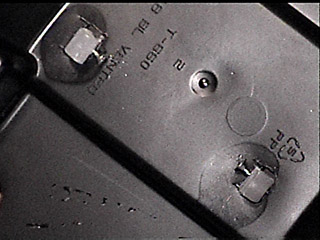
We rivet the Metal Pen Cup To the Battery Cover, just below the top pipe hole that we cut earlier.
The Cassette Tape holder was next. We only placed two rivets on this piece. I doubt we will store anything heavy in this box.
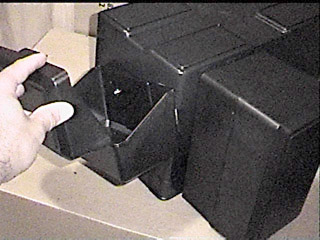
With the items secured to the top Battery Cover we now need to join This first Battery Cover to the second Battery Cover. We'll duct tape the two Battery Cover to one another, ensuring that they will match up after the hinges are secured in place.
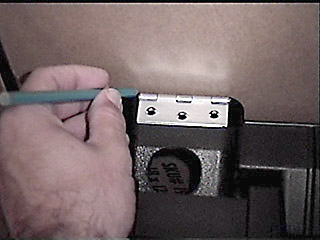
We will hinge the two together along the highest connection points along the designated top seam. We mark the hinges placement in colored pencil, also we'll cut away some of the Battery Cover plastic that hinders us from mounting the hinge flush against the plastic surface.
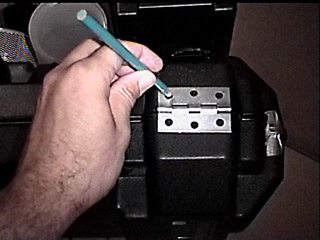
Keeping everything in place, we'll mark the holes that need to be pre-drilled. You should drill all rivet holes, but make sure you mark the holes prior to drilling, ensuring that you drillin the correct area.
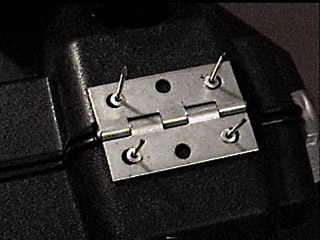
Here you can see the rivet placement prior to using the rivet gun. We only riveted 4 of the 6 holes. "Measure twice, drill once" is a good rule of thumb when dealing with rivets. You do not want to secure a rivet in the wrong place, because once it's riveted, it's tough to take apart.
The two Battery Covers hinged together.
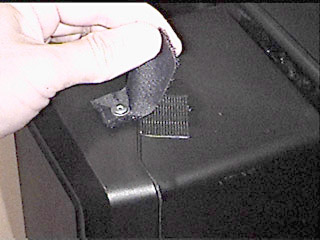
We did add some riser plates to the bottom Battery Cover to ensure that the two covers would line up correctly when closed. We also added velcro tabs to the outside to keep the covers closed.

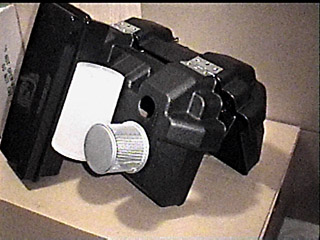
Now lets work on the lower half of the backpack. We'll need only (1) of the Battery Boxes. Flip it upside down so the bottom is facing up. The hinged Battery Covers will attach to this surface later.

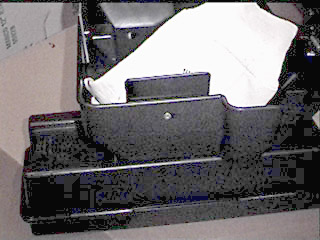
Decide which surface of the Battery Box will be used as the backside of the backpack and rivet the Large Index Card Box to the left side of this surface. Cut a hole about 2 inches from the bottom of the Battery Box also, for the second Ribbed Flex-Tubing to fit into.
Rivet the Small Index Card box to the left wall of the Battery Box. I tilt my box 45° so that the box will be semiupright when the backpack is worn.
Here you can see sticky back velcro placed strategically to keep the Index Card Boxes closed. I highly recommend this for the Larger Black box, for it is mounted on it's side and it will be prone to swing open if jostled enough.
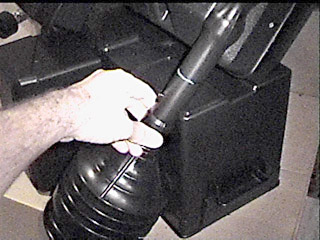
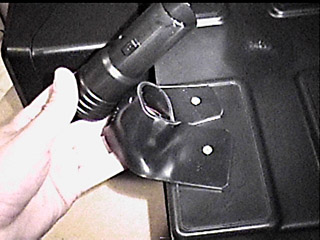
Size up the placement of the Black Plunger and figure out where you need to cut the plungers handle.
You want to leave just enough handle to wrap around a support bracket -AND- attach the second Ribbed Flex-Tubing.
We heated over the oven a strip of black plastic (cut from the unused Battery Box) and wrapped it around the plungers handle and held it in place till it made an adequate mounting bracket. We riveted the bracket to the top of the Battery Box and then riveted the plunger to the bracket.
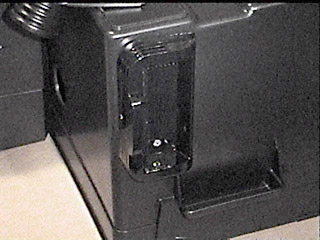
Here you can see where we riveted the Black Business Card holder to the right wall of the Battery Box. We made sure this detail piece would not hinder the placement of the Black Mailing Tube that gets attached later on.
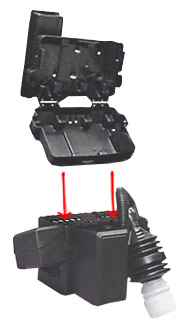
We now can attach the hinged Battery Covers to the Battery Box. I recommend no less than 4 rivets to hold these together. There will be quite a strain on these rivets as you wear the backpack around.
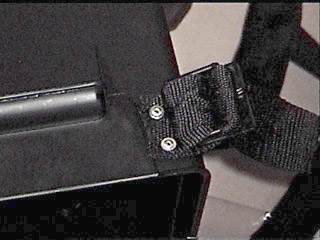
We attached one of each of the ends of the the 2 Inch Black Shoulder straps at the bottom corners of the LEFT and RIGHT walls of the Battery Box...
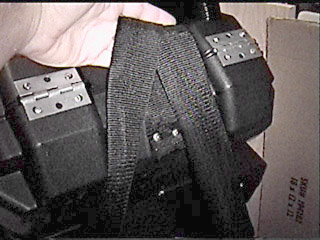
...and the other two ends were attached to the middle/top of the Battery Covers. notice that we connected the strap to the lower Battery Cover, therefore not putting pressure on the hinged upper Battery Cover.
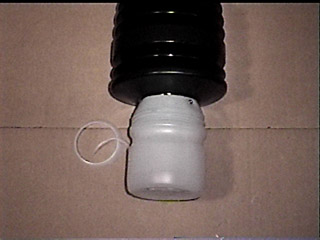
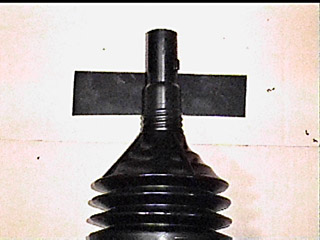
We attached the Kool-aid Container to the bottom of the Toilet Plunger. To get the container to secure to the plunger we had to trim a little off the top of the container first, therefore opening the hole a little larger.
Lastly we attached the Black Mailing Tube to the right side of the entire backpack. We heated up more strips of black plastic over the oven to make some connection brackets. The mailing tube connects to the bottom battery lid, the one that is fixed/riveted to the battery box.
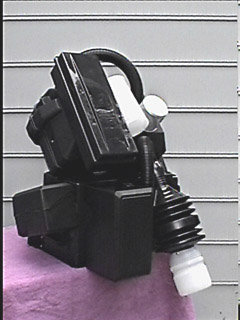
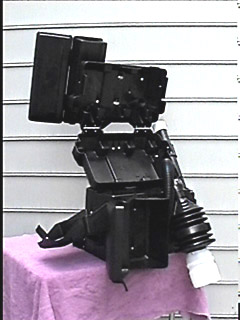
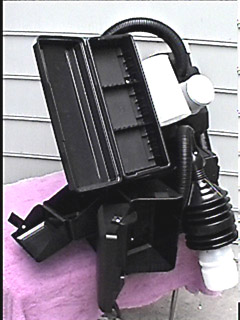
Final Pictures |
||||
|---|---|---|---|---|
|
|
|
|
|
|
|
|
||
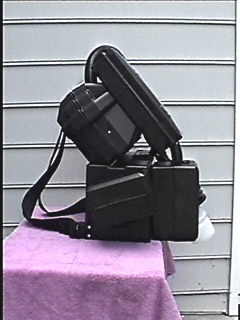
Other Backpacks made from this Tutorial |
||||
|---|---|---|---|---|
 TK1536's backpack |
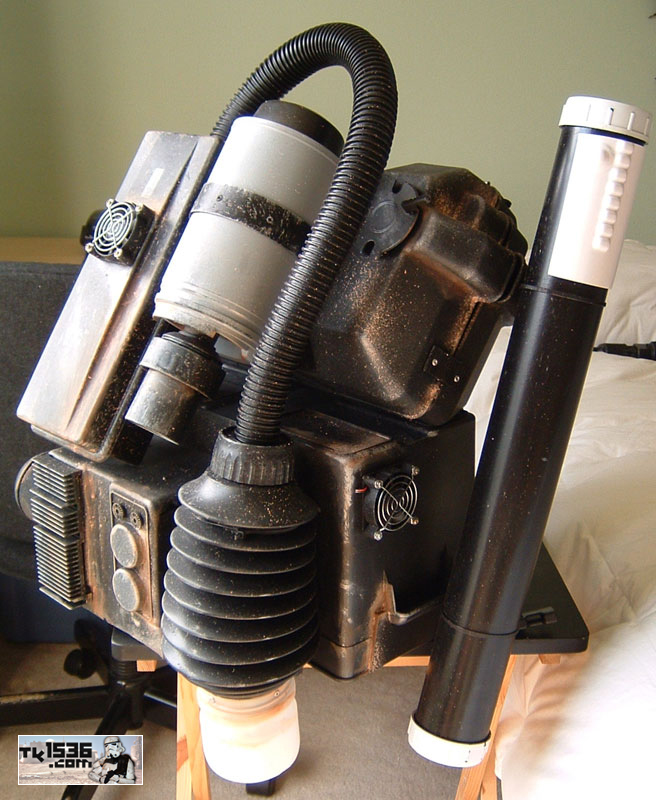 TK1536's backpack (closeup) |
|
|
|
If you have any questions about this assembly,
Contact Us and we'll try to help you out as best we can.