Sculpting The Mask
Okay, you numskulls, lissen up. I'm only gonna tell you how to sculpt the Evil Ash Mask once and only once. If you have to re-read these instructions to get the ideas into your feeble little minds, so be it. I'm not here to hold yer hand.
To make the Evil Ash mask you will first want to start out with a head bust of a human head so that you can accurately sculpt out the mask. This allows for the final mask to come out fitting correctly. If you are prohibited by cost in making/acquiring a head bust you will want to take some time and accurately measure your head to sculpt out an armature. Say it with me... arm-a-ture... Armature is just a big word for "Thing to sculpt on". If you get a chance to read a dictionary, please do. You'll find lots of big words like "armature" in there. Sheez.
Okay...Once you have your head bust or armature ready, you can start sculpting in the details of Evil Ash's face.
Note: The techniques used throughout this website can be used on almost any costume project you do. Making a latex mask is basically sculpting out a subject, taking a negative mold of the subject, pouring the liquid latex into the mold and finally painting the mask. Pretty simple when you think about it. If you have any problems with sculpting out a mask, please, do not come crying to me expecting me to tell you how to sculpt. Sculpting is something you dive into and try out on your own. We can talk about technique, but I'll be darned if I'm gonna tell you how to do the basics. Get in there and start playing, that's how you learn. (grin)
 Let's get serious for a minute, to sculpt out the Evil Ash head, or any sculpture for that matter, you will need to build up the areas you want to sculpt. We know for the Evil Ash head that we need to get rid of the nose as much as possible so we will build up Ash's cheeks to get rid of the nose.
 Also, build up a layer 1/2 inch of clay all around the head first, unlike I did. When you pour the latex mask the latex will SHRINK about 10% as it dries. Adding a 1/2 inch layer of clay all around the head will keep the mask from being too tight on your head. I did not know this when I made my Ash mask and man, is it tight!
You can check the depth of thickness of the clay by pushing in a thin piece of spring steel wire into the clay. The thinner the wire, the smaller the hole you will make.
 For clay you should use an OIL BASED clay like Roma Plastila or Castilene. Any brand will do, you just need to make sure it is "oil" based. Oil Based clay will not harden and this lets you take your time sculpting. You can take months to sculpt something if need be. To soften the clay when first using it, I recommend putting the clay in the microwave for a minute or two. The heat is what softens it up.
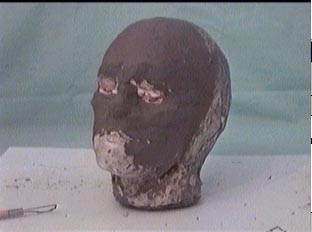 Here is the head mainly fleshed out with clay. We need to put a scar running down the forehead to signify where Brice Campbell cut up Evil Ash with a chain saw. We'll sculpt that next.
 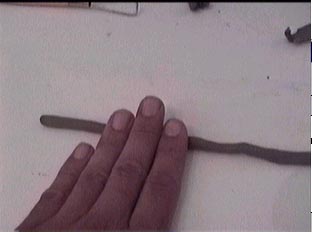 To make the scar we'll roll out a small strip of clay which will become one of the ridges of the scar.
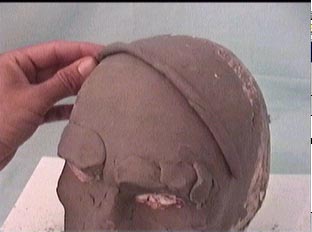
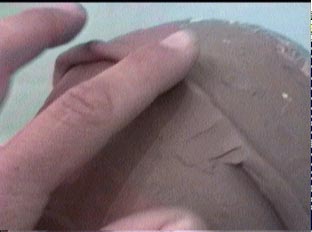
Notice that I've added some chunks of clay to the eyebrows, this helps make Evil Ash look menacing looking.
Just place the rolled up strip where the scar will go.
Now just squish down the outside edge and blend it with the head clay.
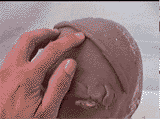
 You'll want to lay another ridge down to make the other side of the scar.
 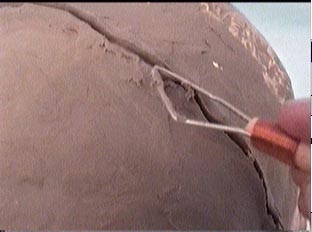 Tweak the ridge of the scar to make it all jagged like you want it. This is the artsy-fun-part of sculpting. (grin)
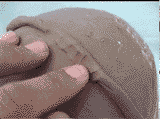
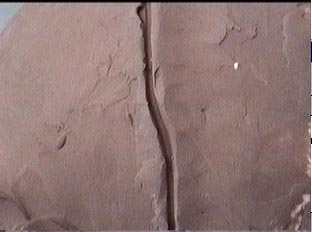 The finished scar ridge. Most of the detail work in the scar will come from the painting of the latex later.
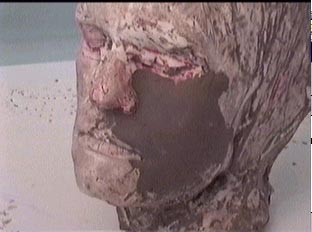
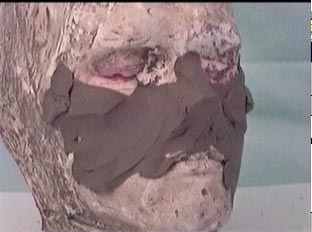
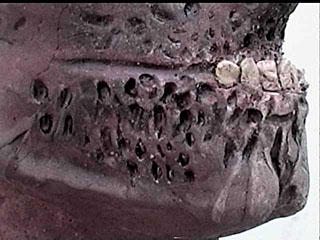
 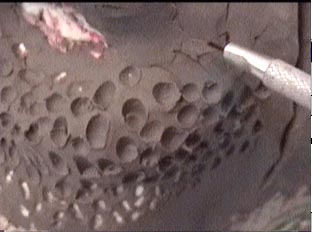 Now let's put scarring into the checks and jaw. This scarring should resemble the shotgun blast that went to Evil Ash's face and the decaying Evil Ash received while he was buried in the ground. I gouged out pits from the clay with a sculpting tool and then rubbed the pits a little with my finger to smooth them out.
 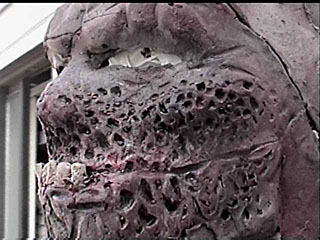 You can also use a paint brush, dipped in a little alcohol, to smooth out the clay. Alcohol will act as a lubricant and soften the hard bristles of the paint brush. The alcohol will break down the clay ever so slightly and allow you to smooth out areaas that you think are too rough.
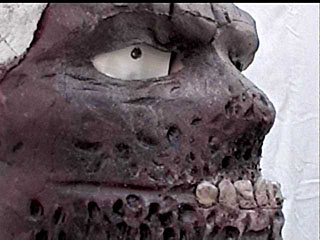
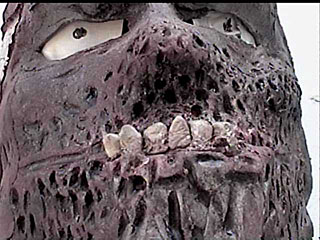
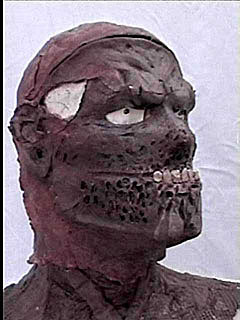
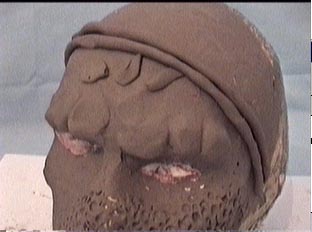
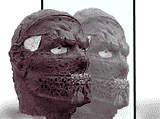
(picts of the final mask for reference)
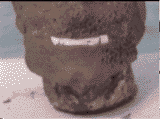
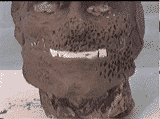
Notice that I put fake teeth on the sculpture so that I could visualize the final piece better.
 Major Tip: If you are sculpting in ears or want to compare one side of the face with the other, setting up a mirror is a great way to refer to the opposite side of the head without having to move the sculpture. Just prop up and adjust the mirror against a box or something until you can see the reflection comfortably from where you are working.
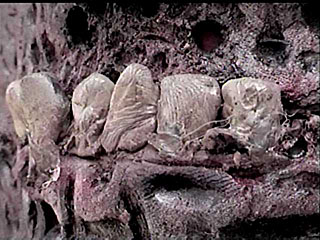 Rough stencil brushes, stiff black stipple sponges and mashing crumpled up plastic wrap into the clay make a couple good ways to put a texture into your sculptures surface. A texture that resembles human flesh is wanted in some areas. If you do not have a texture where texture should be , the latex mask will be completely smooth and look fake. You don't have to worry about this too much with Evil Ash because of his shotblast features, but on other mask making projects you might.
 You will want to add 3 inches of height to the bottom of your mask when you are getting near completion of the sculpture. This extra 3 inches of area , when pulled in plaster, will act as a buffer zone for the edge of the latex mask. This will give you an area where you can mess up the latex process and still not damage the real edge of the mask. Once you have the latex mask painted and looking just like you want it, then you can take the scissors and cut away the extra 3 inches of latex.
It's always better to be safe than sorry.
National Geographic magazines, old or new, are excellent visual references for scars, facial wrinkles and other features found in the human face. N.G.'s photography is rarely surpased by anyone, and those 8X10 closeup shots are amazing in clarity.
Sculpting is a time honored technique. Alot of times you'll get frustrated with what you've created and just want to trash the whole project and go watch TV the rest of your life. Don't that. Don't be another loser who can't finish a project they just started.
You need to stick with the project. A good Evil Ash head would take me about 8 hours to completely sculpt out, and I know what I'm doing. Take your time, relax and enjoy the experience. Using Oil Based clay is one of the best pieces of advice I can give you. It allows you to sculpt something, then walk away from it for weeks on end and come back to the project with a fresh prospective. Rome was not built in a day, and neither is a well made Evil Ash costume.
|
|
The Monstermakers.com Mask Making Handbook is one of the best references for doing latex masks. Worth every penny. BUY IT NOW!!!! |