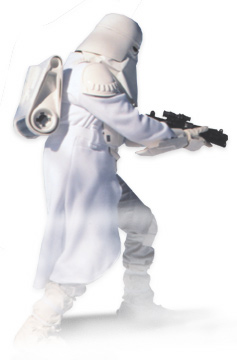
The Shoulders and Arms
The Shoulders and Arms consists of Shoulderbell Armor, Shoulder Straps, Forearm Armor and the Gloves.
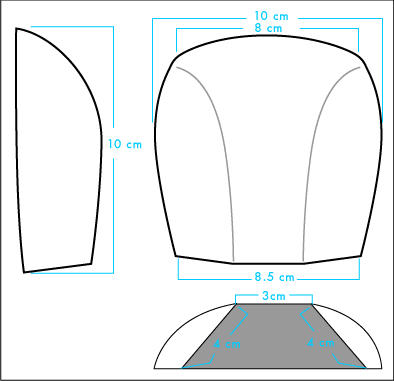
The Shoulderbell Armor
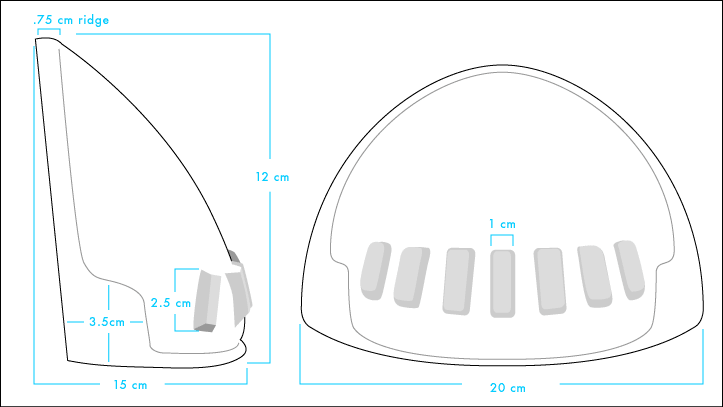 The shoulders on the snowtrooper are covered with a bell shaped plate of armor. This plate is attached to either the trench coat or a web strap that hangs off the shoulder strap armor.
The main details you need to remember when sculpting the shoulder bells are:
- A raised ridge borders the entire shoulder bell.
- At the 90° corners of the bell, the raised ridge turns into a half cirle shape
- There are 7 raised plates the line the lower part of the shoulder bell
The Shoulder Straps
 The shoudler straps are curved pieces of plastic with raised ridges that go horizontally across the surface. the ridges are about XXmm high, XXmm wide and XXmm long.
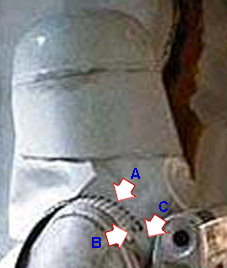
As seen in the picture to the right, the shoulder staps
- connect to the underside of the chest plate and possibly a Chest harness
- have a rivet or bolt connected to the back of the strap
- that bolt connects to webbing that supports the backpack.
The Forearm Armor
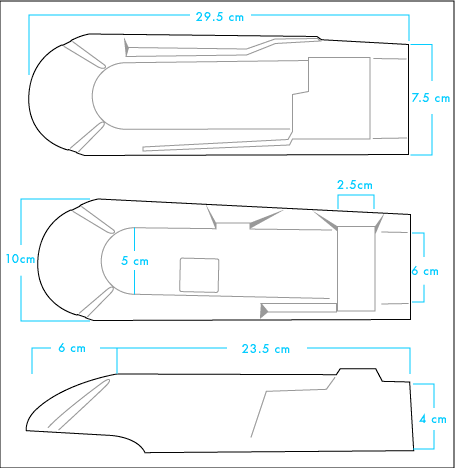 Using these images, you should be able to custom make some forearms out of sheet plastic or wood. Laminated wood plates would work well for a vacuumform plug too.
Probably the biggest thing to remember when making the forearms is that the back rounded area has the indented ridges in it. Also notice in the side shot how the round area is a little more shallow in height than the rest of the armor.
The Gloves
The cloth gloves used in the movies were just standard cotton gardening gloves that you can buy at most any hardware store.
 The palm armor is attached to the back side of the glove. Notice that the palm armor consists of three distinct sides, a top and two sides. The top has a wider surface in the front, narrowing drastically in about a span of 7 cm, then slowly tapering to the back.
Study the images from the Reference Pictures section of this website when sculpting your molds.
You'll want to refer to our plaster casting and vacuumforming sections to make your final vacuumformed armor parts.
-end