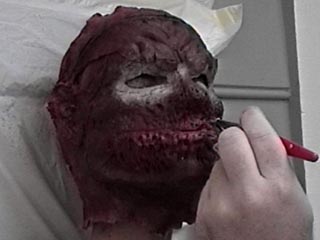
Detailing the Latex Mask
 Great, now that you have finished pulling the latex mask from the plaster mold you are ready to detail and paint the mask. You feel pretty good about yourself nowdays don't you? I bet you think the rest is down hill from there. HA! Suck it up bud, your artistic skills are gonna get tested to the max now.
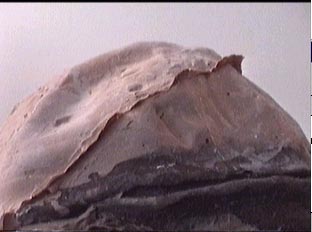
Cut the extra little flaps out of latex that formed at the seams.
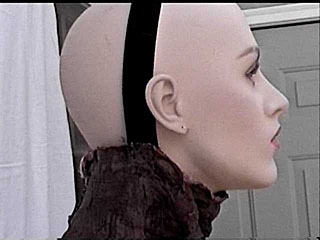
 You'll want to cut a slit in the neck and about 5 inches up the back of the masks head, this will allow you to slip your head inside the mask to wear it. Do not try to stuff your head through the small neck opening of the mask without cutting it first. You will only rip the neck area if you try to do that. Latex is flexible, but not that flexible.
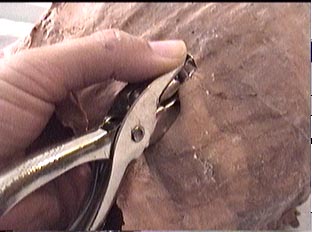
Take a hole punch and punch a circular hole at the very end of the cut line you just made. This round hole should keep the mask from ripping as you put stress on the latex when stuffing your head into the mask.
 Please use a hole punch and not scissors to make this safety hole. Scissors have a tendency to make uneven holes and this might cause the latex to rip under pressure. A hole punch costs little and can save you a lot of headache in the long run.
  Cut basic eyes holes out for you to see out of. Do not make these holes too big at this point, you will actually mark these eye holes larger while wearing the mask.
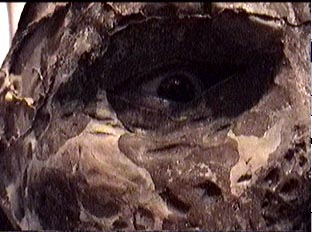
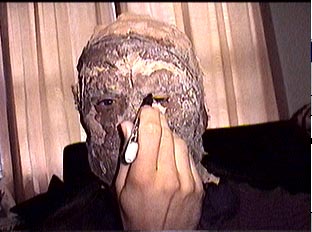

WHAT EVER YOU DO,
DON'T POKE YOUR EYE !
Painting the Latex Mask
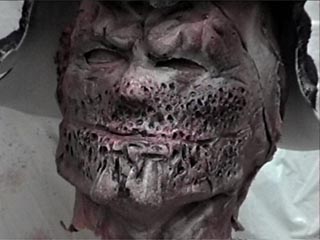
Painting latex masks is no different than painting a picture. The most common tool to paint latex masks with is the airbrush. AirBrushes achieve very detailed and smooth flowing colors. They can reproduce skin tone very well. On the other hand your Standard Paint Brush techniques are useful too. The dry-brush look you can get with a paint brush is very hard to get with an air brush.
The good news is either method can be used with Evil Ash. He is so grotesque and mangled-looking that a bristle brush or an air brush can achieve right near the same effect.
Paint mixture.
As you know latex masks are very flexible. Because of the latex's surface properties you want a flexible pigment to paint with , this makes using a store-bought spray can or house hold paint useless, because those paints dry rigid. Unfortunately, your standard artist watercolor paint will not cover the latex properly either.
Then how do you paint a latex mask ?
Best bet is to use Rubber Cement (the kind you use for arts and crafts) mix it with a pigment of some sort (base colorant, acrylic enamel, or any oil based paint - but NO waterbased paint) and then thin that mixture down with a solvent called Naphtha (available in most hardware stores in the paint section.) Use a 35/15/50 mix of Rubber Cement, pigment, and Naphtha (you can play around with these percentages to see what works best for the pigment used). Rubber Cement is very stick, but takes time to dry. Cutting it with a solvent will allow for a fast dry time while remaining sticky.
Notes on Base Colorant: Have you ever went to a paint store and bought custom mixed paint? Ever seen how that they take a 1 gallon bucket and go over to this contraption that has a bunch of color tubes that they drip into the bucket at precise amounts? Well, those color tubes are filled with BASE COLORANT. It is a pigment, plain and simple. That's what you want to get from a paint store, base colorant, NOT the 1 gallon of premixed paint. Tell them to drip the colorant into a styrofoam cup. Usually a paint store will sell you 1-3 ounces of custom colorant for a very reasonable price. For a mask you don't need much colorant at all. 1 ounce will probably do. For a full body costume, 2 ounces will probably cover the entire costume. Figure out how much colorant you need of each color you want to paint with and buy those premixed colors.
The final paint will be a bit sticky due to the Rubber Cemenet. This sticky surface can be powdered with a translucent face powder (same stuff girls use to powder their noses), or can have a flexible transparent sealant sprayed on top of it. I recommend V-Gloss or V-Matte sealant. Currently (y.2011), V-Gloss/Matte can be purchased in California at Frend'sM(818-769-3834), Nigel's (818-760-3902) and Motion Picture F/X (818-563-2366). Vance Hartwell engineered the V-Gloss/Matte sealant and he is a Hollywood professional who worked on the "Lord of the Rings" movies and a ton of other films.
Email us if you have questions about "base colorant" or "painting masks". We are here to help. Also, your questions will help us identify where our instructions are lacking in these tutorials.
Update: Good news. Monstermakers.com sells a pigmented latex based paint so you do not have to custom mix the naptha/rubberCement mixture unless you really want to.
Now the bad news. We have no images of us painting the Evil Ash mask due to the fact that at the time of painting, the camera guy was getting some sugar from a local wench. Sheez. This means we cannot show you a step by step tutorial on how to paint your mask. Basically you are on your own.
Hopefully we can paint another Evil Ash mask in the future for a client or something and show you how to color Evil Ash just right.
The Neck Area
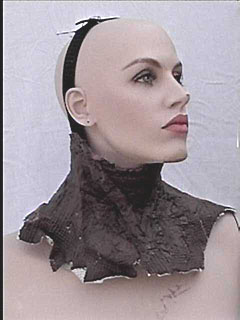
When I made my Evil Ash mask I decided to separate the neck from the head for mobility factors. You can choose to make your neck a part of the mask or not, it's your choice. It takes longer to do in two pieces.
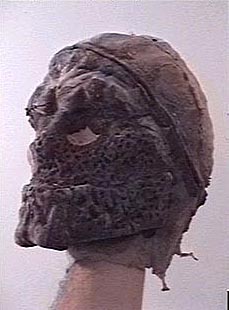
 Here you can see the details I put into the neck muscles. The waffle skin texture comes from a thermal shirt that I cut up and acted as a base for the latex to adhere to. I did not want latex against my neck area, so I glued the mask to the thermal cloth.
I used an elastic band to keep the neck piece from falling down on my neck.
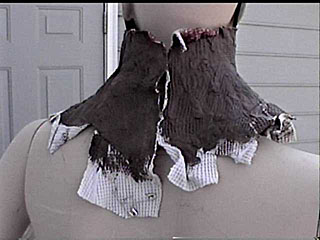 Safety pinned in the back.
|
|
The Monstermakers.com Mask Making Handbook is one of the best references for doing latex masks. Worth every penny. BUY IT NOW!!!! |
-end detailing the latex mask-