Jackets, Coats and Ponchos
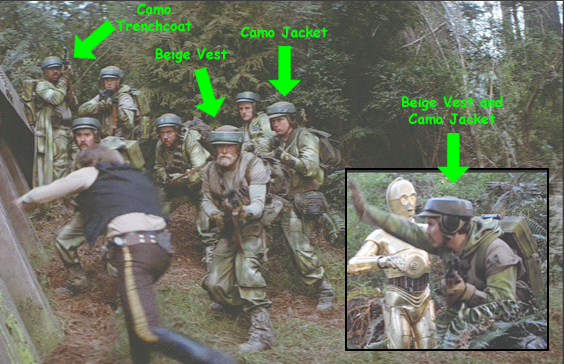
There are 4 combinations of Jackets used by the Endor Rebel Soldier:
- Camoflague Trench Coat
- Beige Vest
- Camoflague Jacket
- Beige Vest with Camoflague Jacket
Camoflague Trench Coat
|
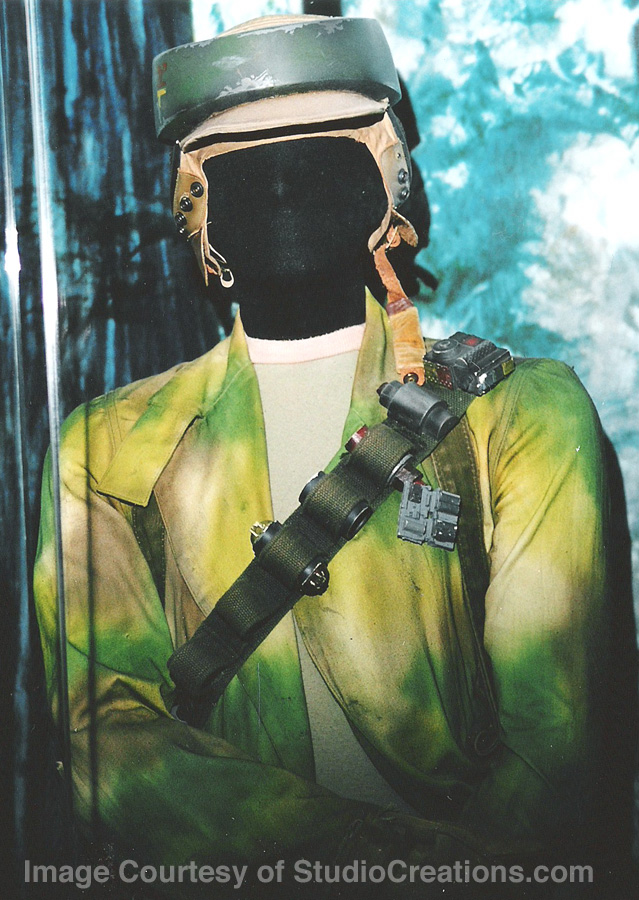
Not seen much in the movies, but greatly highlighted in the "Star Wars: Magic of the Myth" touring exhibit, the Camoflague Trench Coat was basically just an extra long white lab coat, and then painted camoflague. The camo pattern differs greatly from Han solo's trench coat so do not use Han solo's coat for a coloring reference. A lot of fans are taking regular laboratory coats and adding about 6 inches of similar cloth to the bottom, therefore extending their coat to the prop length. There is a 61 cm (24 inch) long slit is sewn up the bottom-back of the trench coat, allowing for better maneuverability while wearing the coat. (pictures showing this slit will be posted soon) |
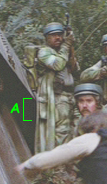
Add two pockets to the trench coat (shown in highlighted area A). These pockets are approximately 15.3 cm (6 inch) wide and 22.8 cm (9 inch) tall. A 15.3 cm (6 inch) wide and 6.35 cm (2.5 inch) tall flap covers the top of the pocket.
|
Click this thumbnail image for a larger photo if the Trenchcoat that was on display at the "Star Wars: Magic of the Myth" Museum Exhibit. |
Beige Vest
"Rogue9" over on the RebelLegion.com discussion boards recommends the McCall's P272 Polar Gear Jacket pattern as a good basic sewing pattern to work with on this vest. You will need to modify the pattern a bit to make the vest look accurate, but, the following observations will help guide you in what to look out for during the design stages of sewing.
|
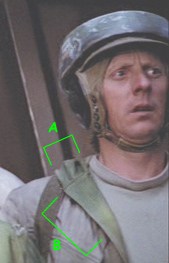
The Beige vest is a semi-loose vest with a good bit of detail stitching across the front and back.
|
- Left shoulder sleeve has a rank badge attached to it.
- Double lines stitched across the length of the back shoulders
- Notice that the sleeve is not a full sleeve, it does not loop all the way under the armpit. It is kind of like an overhanging roof.
- Not sure what we were highlighting here. :)
- Gathering of the cloth at the bottom of the vest. This means the vest has a little bulk to it, but not much.
- Take notice of the 2 inch wide bias running along the bottom of the vest.
We see no evidence of a zipper or buttons that can close the front of the vest together.
|
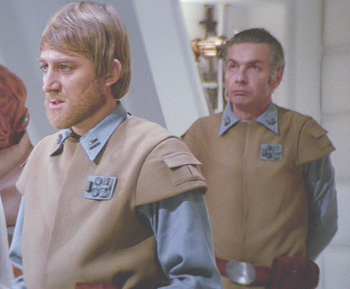
Genreral Nadines vest is similar to the Endor Rebel Soldier's Beige Vest. Notice the half-sleeve and the rounded collar. |
Camoflague Jacket
Like the beige vest, "Rogue9" over on the RebelLegion.com discussion boards recommends the McCall's P272 Polar Gear Jacket pattern as a good basic sewing pattern to start with on this jacket. You will need to modify the pattern a bit to make the jacket look accurate, but, the following observations will help guide you in what to look out for during the design stages of sewing.
|
|
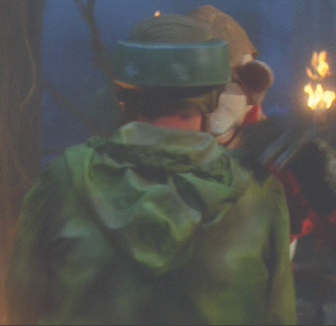
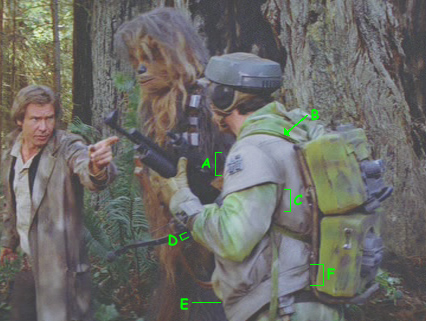
This is a good shot of the back of the hood. If you look closely, you can see the stitch line in the hood edge where a draw string might have been placed at one time.
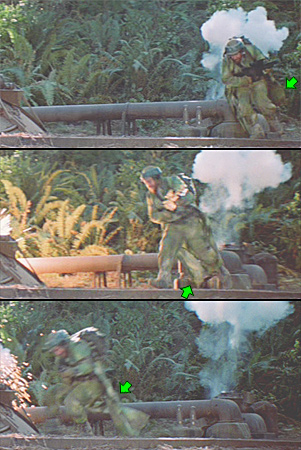
The Camo Jacket is a fairly short jacket when you really look at it. More like a wind breaker than anything.
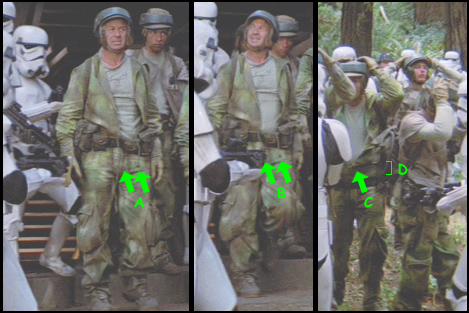
In the images below:
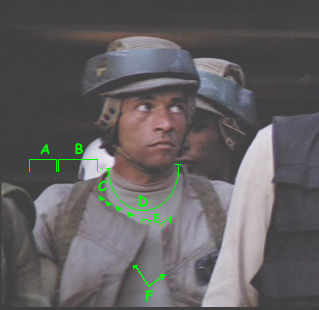
- Notice the draw string cords hanging off the bottom of the jacket
- Drawstring cords!
- Tied together drawstrings.
- Jacket hiked up when arms are raised. Very short jacket indeed.
- Gathering of the cloth along the bottom of the jacket, for a long time costume researchers thought the puckering was caused by an elastic band sewin into the bottom of the jacket, but the presence of a drawstring dispels this theory.
In none of the screen captures we researched did we ever see the jacket closed up in all the way in the front. This means there probably was no zipper or buttons used on the Camo Jacket.

Ponchos
Luke and Leia both wore ponchos over their clothes in the beginning of the Endor ground assault. While I have done only a little resaerch on this costume, Padawans Guide and the costumer known as Kalldar have more info about the ponchos. Search the net for their latest URL addresses.
In my limited research, I recommend fans wanting to do the Endor Poncho to look into using Butterick sewing patterns. Probably pattern number B4266 or the out-of-print B3975Ęor B4672 (which you can probably get off ebay or some vintage pattern seller somewhere online.)
Fellow costumers... please email me any info you'd like to share with other fans about the Endor Ponchos. I will post it here and give you credit.