Flaking and Rubbed-off Paint
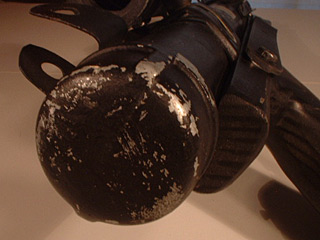
The lack of paint on raised surfaces and corners is a very good sign of wear and tear on an item. There are 3 ways to achieve this effect:
- Sanding/Scraping down the new paint to the original surface
- Simulating the exposed under surface with the Dry Brush effect
- Layering/Latex Masking of the paint
Sanding/Scraping
Sanding/Scraping down the Existing Paint works only when you have the right surface below the existing paint that you want to expose. Making your props out of metal is the best use of this technique, but metal props get heavy and can cost more than your budget allows. I have seen people paint the desired color/look as a base coat and then use rubbing alcohol and elbow grease to rub the top paint coat off, exposing the lower paint surface, but this is a tedious task and takes a lot of patience.
Dry Brush technique
The most common technique in the film industry for flaking and rubbed-away paint is to simulate the exposed under surface by painting the exposed surface on top of the main surface. You want to make the edges of the simulated exposed surface blend gradually into the top coat to make this effect look right.
To achieve this effect you will need to dip your brush into paint, then wipe about 70% of the wet paint off on a cloth or scrap piece of paper. The remaining amount of paint can be applied to the surface in quick, long brush strokes, dragging the paint over the surface until the paint is all used up and you are dragging a dry brush across the surface. This is aptly named the "Dry Brush" technique.
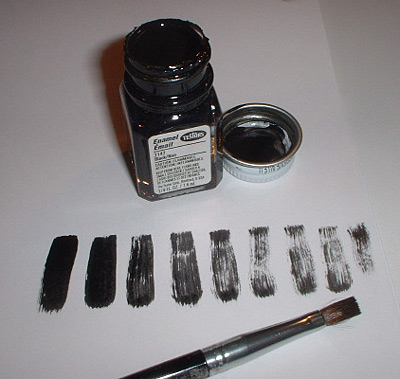
The dry brush technique in use, notice the multiple swipes along the paper to create the "DRY" effect.
Layering/Latex Masking
Latex masking is a technique that a lot of Star Wars Boba Fett costumers use because that is how the paint was done on the movie costume. The end result give the look that Boba Fett has painted his armor many colors over the years and each time Fett was hit by a bullet or thrown to the ground, these layers of paint have been exposed little by little. Grit and grime has pooled up into the cracks and shelves of these paint layers, making the armor look used and abused.
You can achieve this LAYERED effect by painting the armor just like Fett would have: Silver first (to simulate metal), then hunter green, then yellow, then olive drab green. Each time you paint a new layer, you need to carefully dry brush (see above) the desired exposed areas with "liquid latex", the same stuff you use at halloween and Special Effect prosthetics. The professionally formulated product, "Liquid Mask", works well too, but it's a bit more pricey. Some fans have been frugal and used yellow mustard (the food condiment you put on hotdogs and hamburgers) as a masking agent too.
Cut away diagram of Latex Masking technique
 The initial surface.
 Mask of the area where you want the base surface to show through.
 Paint on the first layer of paint and allow paint to dry.
 Mask off area where you want the 1st layer to show through. Make sure you make this mask larger than the initial base surface mask.
 Paint on the 2nd layer of paint and let it dry.
 Mask off the 2nd layer area, making sure each masked area is bigger than the last.
 Spray on the 3rd layer. Continue this masking/painting technique for any subsequent layers you want to do.
 When paint is fully cured, vigorously rub the surface with a gloved hand, or a rag. The latex should just peel away, revealing the lower layers.
Painting thick layers of each color will achieve the "layered look" when the paint layers are exposed.
A good bit of "preparation" and "design" goes into the Latex Masking technique, but the final effect is well worth the effort.
©2010 Studio Creations - All Rights Reserved