|
Plaster Bandaging the Back
|
|
|
Lets start plastering the model. Make sure the bodysuit is fitted correctly before you start. The groin area and the underarms are crucial parts. We didn't adjust our suit and had a 2 inch variation in the groin area where the leggings were DROOPING between the model's legs.
|
|
|
|
This is your last chance ot protect your floor by putting down a tarp or maybe some spare carpet left over from a renovation. Tarps can be slick and make the model's feet slide apart while they stand in place.
|
|
|
|
Make sure the model stands with his knees bent. I have heard horror stories of people passing out while in the bodycast process. Bent knees will help maintain the model's balance and reduce stress to the joints. Our model did not bend his knees and paid dearly for it. He was hurting in the left knee half way through the casting process.
Take the 24 inch wetted bandages from the 'Wetter'. Start from the bottom and work your way up. Use your hand to RUB in the plaster bandage... therefore smooshing out any airbubbles. Put one layer down and then go back for a second layer later.
|
|
|
|
The groin is a vital area for accuracy. I took my time making sure I got the plaster to stay put up in the arch way.
|
|
|
|
Lowerback area.
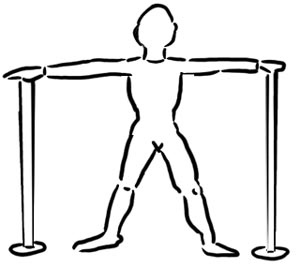
Before you start have the model position his arms in the position you want them to be in. We messed up with out model. His arms we not away from the body enough. Putting plaster bandages in the arm pits was a pain. We recommend to have the model stick his arms out and prop them on supports. If you do it the way we did it... make sure his arms elbows are back far enough for the "Cross bracing support rods" that come later.
|
|
|
 |
NOTE: We recommnd the models hands be positioned lower than the model's heart. We tested the support rod technique in 2006 and the models hands went to sleep after 2 hours into the bandaging process because they were too high in the air.
|
|
|
|
Here we plaster the arms.
|
|
|
|
I occasionally went around to the front of the model to make sure I was getting only 50% of the arm/body... i.e. not wrapping around to the front too much or too little.
|
|
|
|
Doing the other arm.
|
|
|

|
Before putting on the 2nd layer of bandages, I measured the model for the support rods that are needed for strengthening the mold. I recommend you doing this BEFORE you even start putting on the plaster bandages. We took to long cutting the support rods and our model SUFFERED for it.
|
|
|
|
The support rods help to keep the plaster rigid and in place when you pull the plaster cast off the model. Without these supports you would distort the bandages during the releasing process due to the amount of pressure required to separate the items apart. We just wrapped wet plaster bandages around the support rods to adhere them to the first layer of plaster bandages.
|
|
|
|
Here we are putting on the mid-support rod. Our models arms were not far enough back and we had to use a Golf club , a 5 iron actually, to BEND around the torso to attach a support rod. Make sure the models arms are far enough back.
|
|
|
 |
|
|
|
Here we put on the bottom support rod.
|
|
|
|
The upper-support placement. Make sure it's not too high on the shoulder blades. You need an unobstructed path from the mid-support to the upper-support for the diagonal X braces that come later.
|
|
|
|
Here we put on the 2nd layer of plaster bandages.
|
|
|
|
Now we will place the Diagonal "X" support rods on the model for additional support. Once again, We used plaster bandages to adhere the two rods together.
|
|
|
|
We'll basically just make an "X" with the rods. attaching them at both end and them plastering the center of the "X" for additional support. Better pictures are in the Front Casting Section which is coming up next.
|
|
|
|
We place an "X" support stystem on the top half also. While doing this, you will find out if you placed the upper support too high on the shoulder blades or not.
|
|
|
|
The final product.
|
|
|
|
Side view.
|
|
|
NEXT: PLASTERING THE FRONT HALF
|
 |
|
|