The Blaster Body
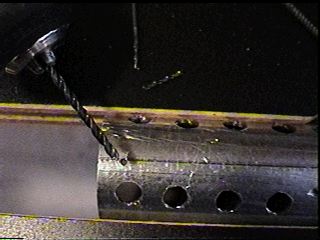
In this section we will drill the holes needed for the blaster barrel ventalation, cap off the ends and attach the sling brackets to the top of the gun. Start by taking a 1 1/4 inch THIN WALL pipe and cutting it to a 15 inch (?)(38 cm) length. Then drill holes in the pipe to simulate air vents for the Sterling rifle. I used a 3/8 inch drill bit for the holes adn put 9 holes in each row. Be very careful when drilling these holes. You might want to drill a smal 1.8 inch hole first as a pilot hole and then drill the larger hole into that. This method can save you some grief.
 There's two ways to drill the rows of holes... all lined up vertically...Or... off center to each other. IF you go with off center rows the offset rows will get 8 holes while the normal rows get 9.
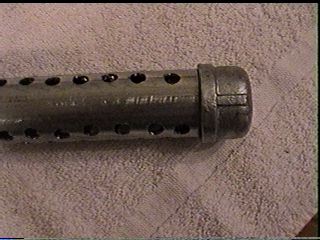 I didn't drill holes on the top of bottom of the pipe due to time. You can option to go with or without these holes on your rifle.
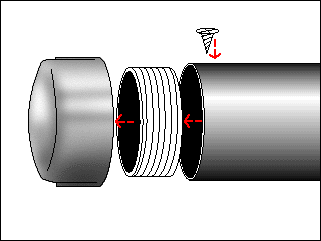 To attach the end caps to the main body we used a threaded pipe fitting that screwed into the end cap and then slid that fitting inside the main body. We will screw the fitting into place with one or two screws.
 Drill out a hole for the the blaster barrel from one of the end caps.
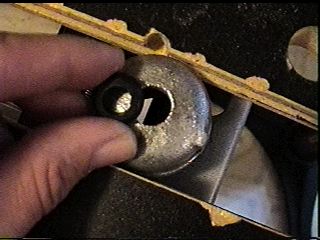 Place a rubber gasket washer into this hole. This gasket will serve as the barrel of the blaster.
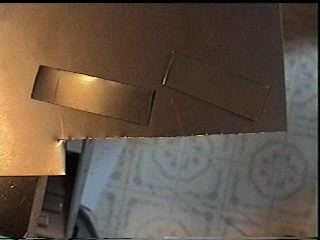 We need to create two sling clips for the replica weapon. These will go on the top of the gun, in the front and back of the rifle. These two pieces of sheet metal will be cut out, grinded down and bent into the shape we need.

Here's the final cut and bent sling brackets for the blaster.
 We need to connect the end caps to the blaster body. Lets pre-drill a hole in the top of the blaster body for the connection screw. Make sure the drill bit is smaller than your screw when drilling the screw holes.
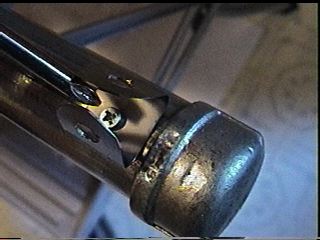 Screw the sling bracket and the end caps to the blaster body. You might want to drill a screw hole in the side of thew gun also to keep the end caps from wiggling. I had some problems with loose screws after a while and found that side screws kept everything in place quite well.
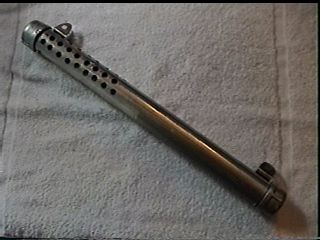 Here's the final results of the end cap and sling connections.